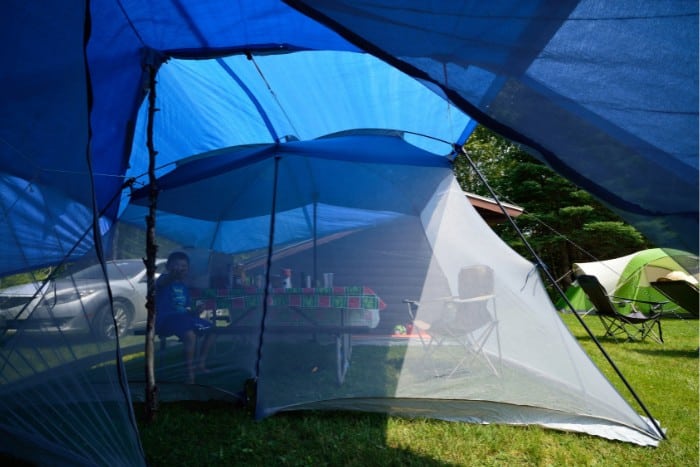
Are you eager to head out for a camping trip, but the weather forecast is calling for rain? Maybe you purchased a cheaper tent without realizing it wouldn’t be waterproof. No matter the cause, you’ll need to know how to get your tent to repel water and become more waterproof.
Waterproofing your tent is as easy as resealing the seams with a sealant or waterproof tape. You can also seal the floor, the tent’s body, and the rainfly with durable water repellent or a sealer made for your tent fabric. Patch any holes that are leaking water with Gorilla tape first.
Here is what you need to know for more ideas on how you can easily waterproof your tent.
What are Some Easy Methods to Waterproof Your Tent?
You want to ensure that you’re prepared for any weather event that could pop up on your camping excursion. Rain is an unavoidable part of life, but it doesn’t mean that you have to get wet.
The good news is that there are quite a few easy methods to waterproof even a cheap tent with a little ingenuity and know-how.
Here are some of the simplest methods to help you stay dry in a storm.
1. Reseal the Seams
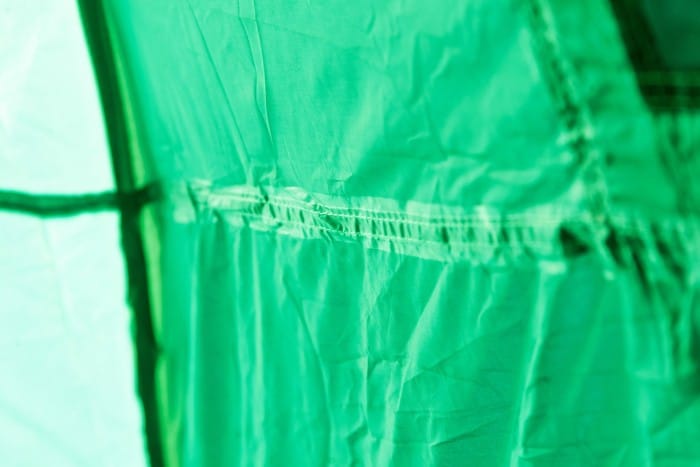
Most tents on the market today come with sealed seams that work to keep light moisture from entering the tent where two pieces of fabric meet.
Even if your tent initially had this feature, it may have worn down over time. If your tent is starting to leak in the rain, it may be time to reseal those seams.
Don’t plan to do this as an on-the-fly remedy when you’re out camping and it starts raining on you. Instead, do this at home when the weather is nice, and you have adequate lighting.
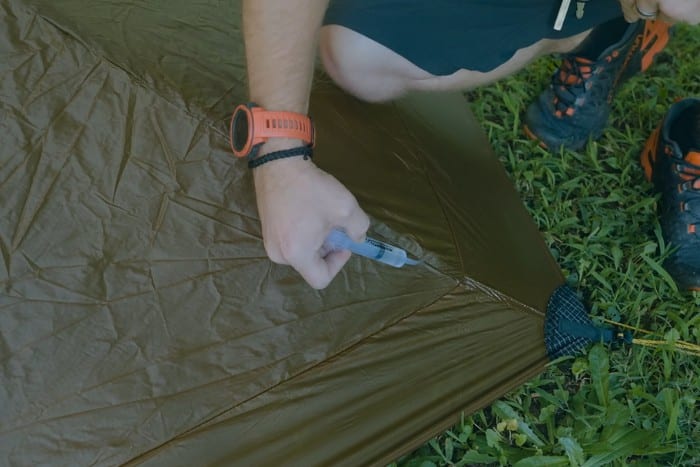
If your seams are coming undone, clean the areas with rubbing alcohol and apply a thin layer of seam sealer.
Remember that you need to get the right type of seam sealer based on the fabric your tent is made from. Look at the manufacturer guidelines to see which type of seam sealer is the right fit for your tent.
Seam Grip makes a nice line of sealants that are designed for different types of tent fabrics. Be sure to double-check yours before you buy any of these bottles.
Let the seam sealer dry completely before you take your newly-waterproofed tent for a test spin. Depending on the fabric and sealant used, it can take up to twelve hours to dry.
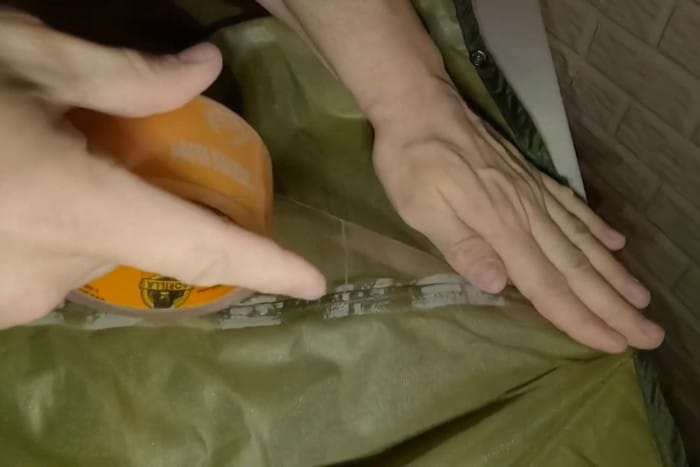
2. Tape the Seams
If resealing the seams feels too complex and makes you nervous, you might want to simply think about taping the seams. While this may not look as nice, it does the job.
It can be a great option if your seams start pulling away from each other with lots of wear and tear. All you need is a roll of seam tape, such as Gorilla tape, to do this.
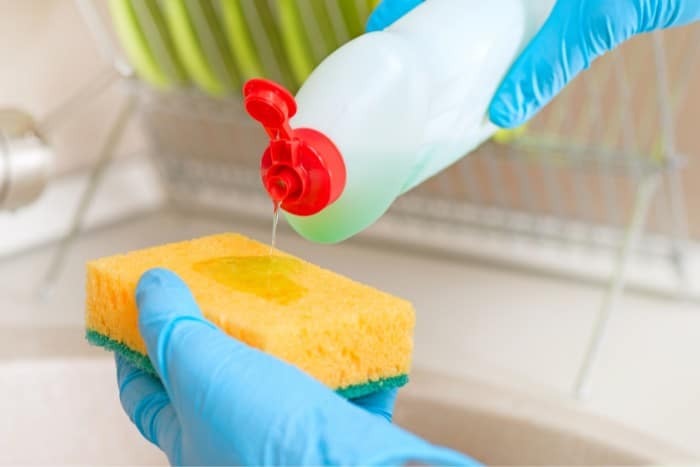
Clean your tent to the best of your ability with a mild cleaner, a sponge, and some elbow grease. Allow it to dry completely.
Once it’s dry, you can make your tent more waterproof by taping those seams. You can do this from the inside or the outside – it’ll be just as effective either way.
If your tent looks nice on the outside, it might be better to tape the inside. However, it’ll be a bit harder to tape in the inside seams as you crouch or recline in the tent.
The best part of this method is that there’s no waiting time for things to dry. You can simply move on with the rest of your camping trip.
This is a great thing to do on the fly if you realize that you’re starting to get wet and don’t have any other options when you’re at the campground.
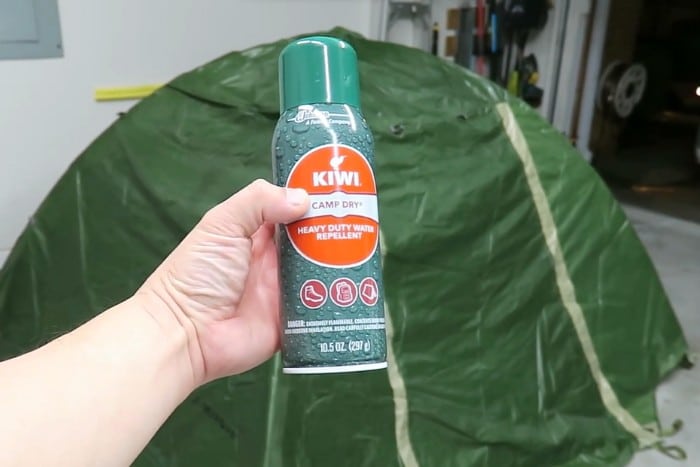
3. Durable Water Repellent
Last time you went out on a camping trip, you noticed that the water was no longer forming neat beads on your fly. This is a common occurrence that can easily be remedied in just a few minutes.
Like resealing the seams, you must ensure that your tent is clean and dry. This means you won’t be able to do this on the fly when you encounter a rainstorm.
After the tent is cleaned, spray some durable water repellent spray over the outside of the tent. Let it sit on the fabric’s surface for a few minutes, then wipe it away with a damp cloth.
There are several name brands of durable water repellent spray that you could purchase, such as offerings from Kiwi, Scotchgard, and more.
Do some research to see which ones will work with your tent’s fabric before purchasing. The good news is that this is a relatively small investment that usually costs under $20.
It should be completely dry before you pack it up for your next trip.
4. Seal the Floor
When it rains, water often pools underneath the tent. Not only does it get you wet, but all of your gear suffers too. Fortunately, sealing the floor can be as simple as resealing the seams.
It takes a little bit of hard work to dry that floor in the next rainstorm. First, make sure that the floor and seams of the bottom of your tent are completely clean.
If they aren’t, wash them thoroughly and allow them to dry before moving on to the next stage. From here, you will seal the seams that pertain to the tent floor in the same way described above.
Once this is done, you can use a fabric sealant for your tent’s specific fabric. Apply it all over the floor using an inexpensive foam brush that can be discarded when finished.
It works best if you apply two coats of your sealant. Make sure that you seal both the inside and the outside of the floor to get the best effect.
It may require a little more work, but staying dry will be your reward.
5. Seal the Body
If you purchased your tent without the intention of camping in the rain, you might not have decided to spring for the waterproof version.
Fortunately, you can keep the rain from coming into your tent, but it’ll take some hard work and elbow grease. Much like the other types of sealants, you must purchase the right kind for your tent fabric.
Check with the manufacturer to see what your tent is made from (synthetic, nylon, canvas, polyester, and vinyl are all possibilities). Then look for a compatible sealer.
The first thing to do is to get your tent wet. It’s probably better to do this with a hose in your backyard than to wait until a rainstorm comes.
From here, you can apply the sealant around the entire body of the tent, excluding any mesh parts that are there for ventilation.
Don’t forget to pay close attention to the seams! Let it dry completely before you pack it up on your next camping trip.
6. Sealing the Rainfly
If you’re lucky enough to have a rainfly on your tent, then you may only need to focus on this one aspect of your tent. Over time, the factory-applied waterproofing can fade.
In turn, this leads to some pretty wet nights. Fortunately, sealing your rainfly is easier than sealing the tent’s body. Spread out your rainfly and clean it with mild soap and a sponge.
This is more about elbow grease than harsh chemicals to reach your goals. Once you’re sure that the rainfly is as clean as can be, you’ll need a water repellent.
You can purchase either a spray-on kind like Revivex, or you can use the same sealant that you used on the body of your tent.
Either way, spray or apply the sealant, wipe off the extra with a clean rag, and wait for it to dry. Always ensure the rainfly’s new waterproof coating is completely dry before packing it.
This could take mere minutes if using a spray-on or several hours if using something else. Plan to know how much time you’ll need to keep your coating from getting messed up by packaging it too quickly.
7. Patch Rips
Rips and tears in your tent fly can lead to damp nights around the campsite. One of the quickest ways to waterproof your tent is to patch up those holes and seal them with waterproofing material.
First, you could stitch them up, but they may not have the waterproofing effects you need. Many prefer to tape their damaged seams or rain flies with Gorilla tape.
Not only will this hold up in extreme circumstances, but it’s also waterproof. That means it’ll instantly stop the rain from coming into your tent through this small tear.
This is a great item to keep in your pack in case of emergencies at the campsite.
8. Maximize Canvas
Many people love the durability and style of canvas tents, but they become alarmed when their tent – supposedly waterproof – starts to leak during the first rainstorm! There’s no cause for alarm here.
It’s perfectly normal for a canvas tent to leak the first few times it gets wet. You’ll be happy to know that those little holes letting water in right now will get much smaller when the tent dries!
To avoid going through this wet ordeal during your next camping trip, try setting up the tent in the backyard and dousing it with water from the hose. Allow it to dry, and repeat a couple more times.
You don’t need to add anything to it. You might even find that it can ruin a canvas tent’s natural waterproofing.
9. Add a Tarp
Do all of these methods of waterproofing your tent sound like too much work for you?
The good news is that you can use the same old tent without waterproofing in the rain with one small and inexpensive investment: a tarp.
If you’re afraid that a storm is blowing in, you can keep your tent dry by hanging a tarp over the tent and keeping it covered.
Keep in mind that the exterior walls of the tent aren’t the only place where you need protection. Water will also run underneath the tent and can get you (and your gear) wet.
Place a second tarp under the tent during setup. For extra security, you can even layer the third tarp around the inside of your floor.
How to Make the Most of Waterproof Techniques?
Before you think you’re ready to move on to your next camping trip, here are a few more general facts about maximizing your tent’s waterproof abilities.
1. Know Your Tent
If you want to add a sealant or durable water repellent (DWR) to your tent, you need to know what fabric it’s made from. Using a sealant for a vinyl tent on your canvas tent will lead to some serious problems.
Not to mention, it won’t allow you to be waterproofed fully. Take a few extra minutes to check with your tent manufacturer to verify what your tent is made from.
2. Simplify Cleaning
Before you take any steps to waterproof your tent, you must ensure that the fabric is clean. You can use a mild cleaner and a sponge and water to get it clean.
Avoid using anything too harsh, as this can make it harder to create a waterproof barrier. Using elbow grease instead of harsh chemicals is always preferred.
Remember that cleaning your tent before storing it is always good practice. This will help you to keep your waterproofing in good shape.
Otherwise, oils and dirt can break down these coatings and shorten the tent’s lifespan and its waterproofing.
3. Allow Adequate Dry Time
The time to waterproof your tent is not ten minutes before you leave for your trip. You must let your tent dry completely before packing it and hitting the road.
This might mean that you need to start a few days in advance, particularly if you want to cover it with multiple layers of waterproofing sealant.
Final Thoughts
If you want to make your tent more waterproof for your next camping trip, there are several ways you can go about it. Determine which part of your tent needs the most attention and start there.
Whether you need the rainfly patched, the floor sealed, or just some reinforcing of the seams all the way around, this guide will give you everything you need to know to tackle this project on your own!