Are you getting ready to hit the trails for your next camping excursion and need to know how to effectively pack your backpack? Maybe you purchased a new backpack and want to ensure you use it to the best of your abilities. No matter what, you need to know all the ins and outs of packing a backpack for camping.
To pack a backpack for camping, keep weight distribution in mind. Utilize the side pockets, lash points, and use a packing system to make the most of storage. Lay out your necessities before packing, and make it a goal to fill all gaps. Pack from the bottom up, keeping weight to a minimum.
Here is what you need to know for more information on how to successfully pack a backpack for camping.
Best Tips to Pack a Backpack for Camping
Packing a solid backpack for your next camping trip is an essential skill. It’ll help you organize your gear and understand where everything is located inside the pack.
However, learning how to pack your bag is a bit more complex than trying to Tetris your gear inside the backpack.
If you want to know our top tips for packing a backpack for camping, here is what you need to know.
1. Weight Distribution
One of the easiest ways to go amiss with your backpack packing is to ignore the weight distribution in your pack.
This makes it much more challenging to carry, especially if you must trek long distances to reach your campsite. Knowing what order and where to position your items is an essential part of packing.
At the bottom of your pack, you should keep all your midweight items, including your sleeping bag, sleeping pad, and even a pillow.
Despite what you may think, this isn’t the place to store the heaviest gear.
Plus, it’ll be more challenging to get to, so you want to store things here that you know you won’t need while on the trail to your campsite.
Next up, the middle of your pack is split into two sections: the back panel and the front pockets.
Close to the back panel, you’ll want to store your heaviest items, such as tents, cookware, camping stoves, and even extra water. The part that sits closest to your back should be the heaviest part of your backpack.
On the outer part of the middle section, you’ll keep your lightest items, such as towels and even your lightweight clothes, for the remainder of your trip.
At the very top of the backpack (the lid) is where you’ll store small items you may need to access while getting to the campsite.
For example, it’s a great place for snacks, a lighter, and even a first aid kit. If the weather runs the risk of turning inclement, you might also want to store a rain jacket here in the lid.
2. Utilize Side Pockets
Many people spend an excessive amount of time making sure that the main compartments of the backpack are utilized, but they neglect the side pockets.
These are ideal for items you may need in a pinch, like a whistle, a knife, or even your first aid kit for blisters from your hiking boots.
A simple bottle of water, bug spray, a map, and even your car keys can all be placed inside the side pockets.
This is great for fragile items or small items you don’t want to lose inside a cavernous and tightly-packed backpack.
3. Use a Packing System
Experienced campers know there’s some real benefit to using a packing system for their backpacks.
While it may add some nominal weight to your pack, you’ll be happy to know that all your items are in their right place.
Having bags and stuff sacks is essential to keep your items organized and minimize the space they take up.
There are other benefits to having stuff sacks and a packing system for your backpack. For example, they might be waterproof to protect your items from getting wet while on the trail.
They could also be compression bags, allowing you to squeeze valuable space out of your pack.
It may also be a good idea to consider odor-proof bags to keep wild animals from smelling food and toiletries.
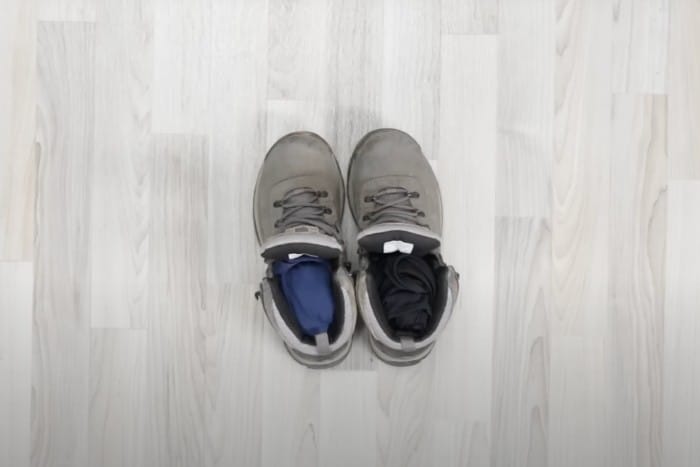
4. Filling Gaps
Depending on what you decide to pack for your camping trip, the odds are that you’ll have some items that are a bit bulkier.
Cooking items such as pots and pans or cooking stoves are often some of the bulkier items that are must-haves in your pack.
However, they can also lead to large space gaps in your backpack around these awkward items.
Instead of allowing that space to go to waste, try wrapping your bulkier items in things that can easily accommodate that space, such as extra clothes or snacks.
You may even be able to wrap some of these items in your sleeping bag for a more efficient packing method.
5. Use Compression Straps
For many campers, the issue of packing their backpack is that they have too much stuff they want to bring and not enough space for all of it.
However, sometimes you’ll run into the opposite: your backpack isn’t full enough because you’re only going for a short trip over the weekend or even for a single night.
This is where compression straps come in handy.
All you have to do to make good use of your compression straps is to load up your backpack with the items in the order you want.
Lay it on its back panel and pull the compression straps tight to keep your items pressed against your trunk. That’ll make it easier to carry without your items rolling around in all the extra space.
6. Lay Out Your Necessities
How much is too much to pack for your next camping excursion? While this question often plagues novice campers, even experienced campers can struggle with overpacking.
One of the best things you can do to minimize the risk of putting too many items in your pack is to simply lay everything out before you start packing.
Sort your clothes that you’ll need into separate piles – one for each day you are camping. You can even fit each day’s clothes into a Ziploc bag to keep the items together.
Pieces you’ll wear multiple days (like rain jackets or coats) can be stacked to the side. It’s also a good idea to do this with your food.
Figure out what you’ll eat daily, including your water and snacks. Put each day’s food in a separate bag so that you know exactly what you have for every day.
This will prevent you from packing more than you need and helps you to see what items need to be squeezed into a full pack from the beginning.
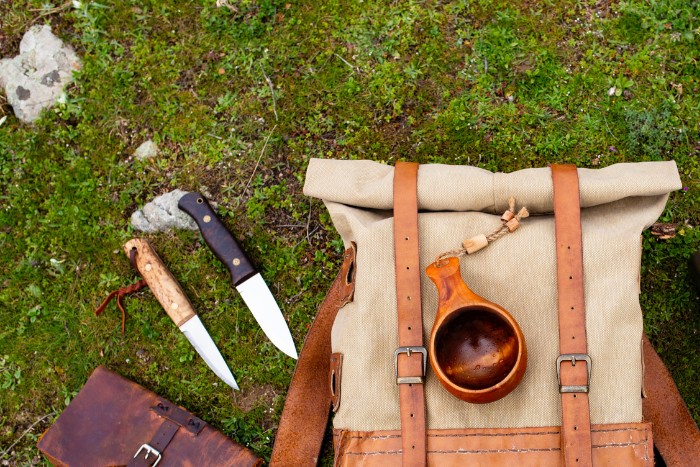
7. Prep Sharp Objects
Is there anything worse than showing up at your campsite in the middle of a downpour only to learn that your knife set accidentally poked a hole in your tent?
If you aren’t careful about how you’ll pack some items, you might run into problems like this.
Sharp objects like knives, camping gear, and even your tent stakes must be carefully packed in durable, padded packs.
When possible, keep some of the pointiest items out of the main body of your pack, securing them in the outside pockets.
8. Make Good Use of Exterior Pockets
While we covered what to pack in the lid of your backpack, it’s time to pay more attention to the actual storage capacities outside your pack.
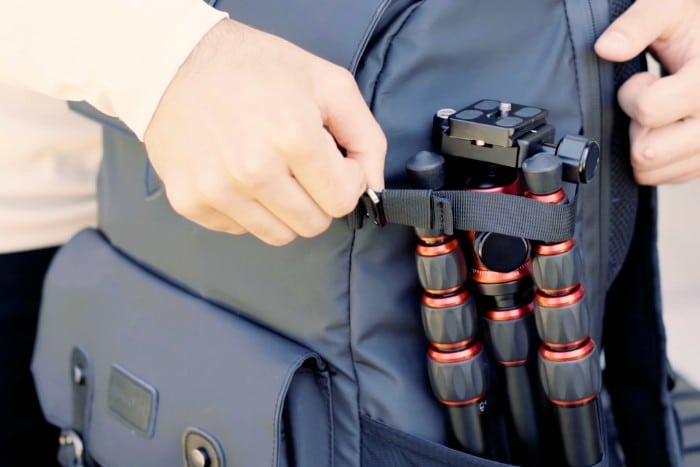
If you have daisy chains or lash points, this can save you tons of room with bulky items inside your pack. Namely, one of the best things to do is to attach your tent poles to these points.
This keeps sharp objects out of your pack and allows you to pack your bag more easily.
You’ll have plenty of room for objects like a trekking pole, an avalanche shovel, and other simply too unwieldy items to fit into your backpack.
Of course, this is also a great area to attach items you know you’ll need while on the trail.
Extra water bottles, snacks, and even a first aid kit for blisters from your hiking boots are all great ideas to pack into the side pockets or to attach via a small bag to the lash points.
9. Minimize Heavy Items Outside the Backpack
While using those exterior lash points for some of your bigger equipment might be tempting, you might want to steer clear of this tactic.
Attaching heavy items like your entire tent or sleeping bag is problematic. It places the bulk of the weight outside the pack, either on the far side of the backpack or at the bottom.
As a result, it can throw off the weight distribution and become harder on your back to carry.
If you must attach things to the outside of your backpack, make sure that they’re light and that there’s no way to fit them into the backpack otherwise.
For example, this is a great place for lightweight poles, sleeping pads, and camera equipment.
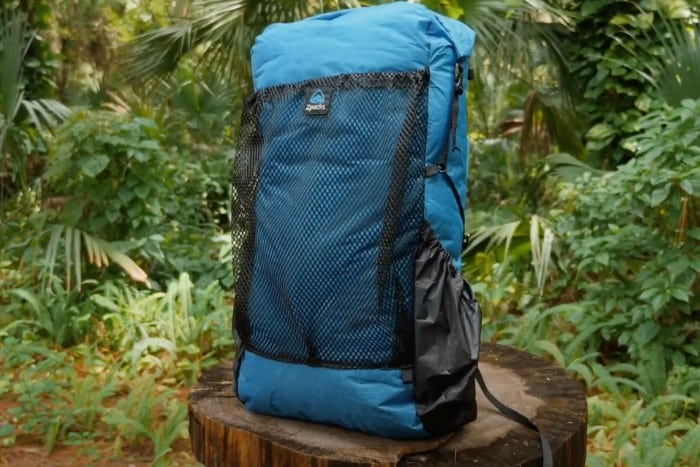
10. Get the Right Backpack
Of course, packing your backpack the right way doesn’t matter if you don’t have a pack that will be comfortable enough for you to carry long-term.
Make sure it sits comfortably on your back and shoulders before you invest in a quality bag. This is where it can be helpful to head to your local camping goods store to try them on versus ordering one online.
You also need to consider the overall backpack size you’ll need. For a single-day trip, you may only need a 30-liter backpack. Weekend trips often require 50 liters.
Trips longer than three days may require a 75-liter backpack, while super-long trips might warrant a 110-liter backpack or more.
Consider how often you’ll use your backpack and how much stuff you’ll have to carry before you commit to a specific backpack.
Bigger isn’t always better and can be more challenging to carry if it isn’t packed to the brim with your gear.
11. Pack from the Bottom Up
One of the best things to do when packing your backpack is to start from the bottom and work your way toward the top.
We’ve already covered what items should be positioned where in the pack, but now it’s time to look a little deeper.
Instead of stacking things from the bottom to the top, think about layering your items in rows. Place down an item and then fill in all the nooks and crannies around it to the best of your ability.
This might mean squeezing in some lighter items, even if it’s located in the central part of your backpack. This is also a good time to ensure that weight is evenly distributed from left to right.
An unbalanced backpack can cause undue stress on your spine. By building rows, you can keep your backpack from getting too top-heavy and ensure that everything you need fits nicely into the pack.
12. Pack a Rain Cover
You never know what the weather might hold if you spend a decent amount of time hiking to your campsite.
Chances are you thought ahead to include a rain jacket for yourself, but did you invest in a waterproof backpack? Not all models will stand up to the rain with a water-repellent finish.
Check out my recommended waterproof backpack models!
You can always purchase a secondary rain cover if your backpack doesn’t fare well in the wet weather.
This fits over your backpack and cinches around the back panel to prevent rainwater from getting to your goods. Always pack your rain cover in the lid or side pockets to have it ready when the clouds open up.
13. Keep Weight in Mind
The goal isn’t always to carry as much weight in your backpack as possible. Sometimes, you’ll find that your pack is merely too heavy for your core strength or your back muscles.
In general, this means that you must be conscious of what items are absolute essentials and which ones are merely nice to have while camping.
How heavy is too heavy for your backpack? Generally speaking, most people can carry a backpack that is roughly 20 percent of their overall body weight.
The lighter the backpack is, the easier it’ll be to carry and the less tired you’ll feel if you have a long hike ahead of you.
Final Thoughts
Packing a backpack for a camping trip doesn’t have to be a hopeless endeavor. You can keep your weight distribution in mind while utilizing all storage functions for an easier load to carry.
A backpack doesn’t have to be a hassle to pack, but it does require some planning via laying out what needs to fit inside.
With some of these tips, you’ll pack your backpack like a pro for your next camping trip!