Are you eager to go camping this winter but not sure how you’ll fit all the needed supplies in your backpack? Maybe you’re an experienced camper who just wants to carry their equipment more easily with less pressure on their back and torso. No matter what, you need to know how to pack for a winter camping trip.
Pack your backpack for the winter with the essentials (tent, sleeping bag, and sleeping pad) first. Pack light layers and wear bulkier items, including boots. Balance the load and keep the heaviest items in the middle of the pack. Use compression bags to maximize space. Wrap bulky gear in clothes.
If you need more tips on packing your backpack for the winter, this guide will show you how to pack more efficiently.
How to Pack a Backpack for Winter?
Camping shouldn’t have to stop just because the weather is less hospitable to campers.
You can easily learn how to pack a backpack for winter camping trips, but it takes a little more know-how and planning than a summer trip might require.
You’ll have to think about extra gear and be more strategic with how everything fits into your backpack.
For the most part, you’ll likely need a larger backpack for winter camping. It will require a heavier sleeping bag to brave those freezing temperatures, and your four-season tent may take up a bit more space.
This is a perfect time if you’ve been thinking about investing in a larger backpack. You’ll need every inch of space to adequately prepare for your upcoming winter camping excursion.
Here are a few great tips to help you get started when it comes to packing all of the essentials.
1. Remember the Essentials
Before packing the smaller items you think you may need, don’t forget that your backpack needs to house those hard-to-carry items like a sleeping bag and tent.
Find a way to get these items into your backpack first. You might be able to do without an extra bottle of water, but you won’t want to go without your down sleeping bag.
This also allows these items to go in the bottom of the pack since they won’t be needed until you set up camp for the night.
This gives you access to the other items you might need sooner if you travel a long distance from your car to the campground.
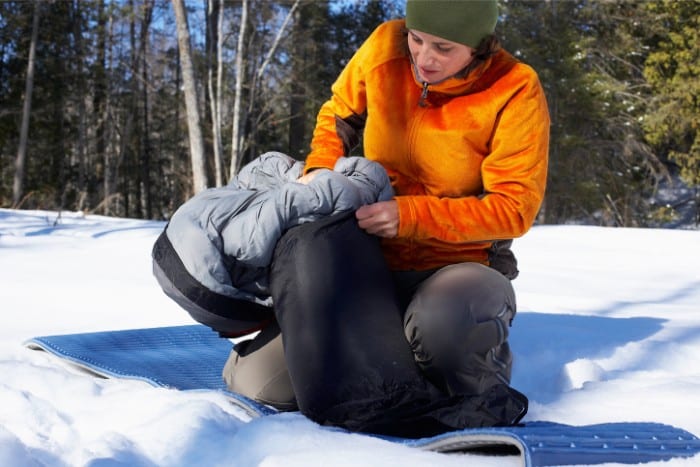
A sleeping pad is also necessary if you’re camping somewhere cold. The higher the R-value, the more likely it is to keep your body heat from transferring to the cold ground while you sleep.
If you want to wake up warm and toasty in your winter sleeping bag, you’ll want to pair it with a sleeping pad also carried in the bottom of your pack.
2. Pack Lightweight Clothes
Make the most of the room in your backpack with lightweight clothes that can be easily layered in a pinch. It’s best not to pack items with some bulk, like sweatshirts.
You may still have a few of these items, though. The question is: how do you make the most of the space in your backpack that’s dedicated to clothing?
The best way to use your available space is to army roll your clothes. You should also order them based on how bulky or heavy each layer is. The heavier the layer, the further down in the backpack it should be.
You can save room in your backpack by wearing your bulkiest layers on the way to your campsite.
Instead of bundling up a down jacket and roll after roll of wool sweaters, you should put on as much as you comfortably can without overheating to get to the final destination.
3. Pack Extra Clothes
Even if you’re trying to pack only the necessities, always bring more layers of clothing than you think you’ll need.
You never know when a layer will get wet from sweat as you set up camp or because the rain drenched you to the bone.
To prevent hypothermia in those cold winter temperatures, you’ll need to stay dry, as it’s the key to staying warm.
Don’t forget to pack extra layers for your upper and lower body and some extra wool socks. Pack some extra boot liners just in case your feet get wet. You won’t want to be without dry feet in icy temperatures.
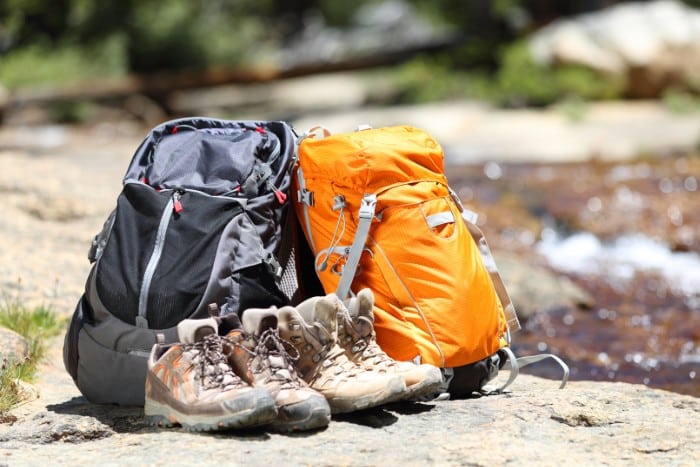
4. Don’t Pack Your Boots
Boots are an absolute must-have for winter camping. They keep your feet as warm as possible and are frequently waterproof to protect you from melting snow and ice.
Many people don’t like hiking in their boots, so they may want to pack a second pair of shoes. You have to consider what you have room for in your backpack.
Chances are that your boots take up too much space in a small backpack, but they’re an essential item you don’t want to leave behind.
Instead, you should wear the boots and pack a lighter pair of shoes you prefer for hiking in the backpack.
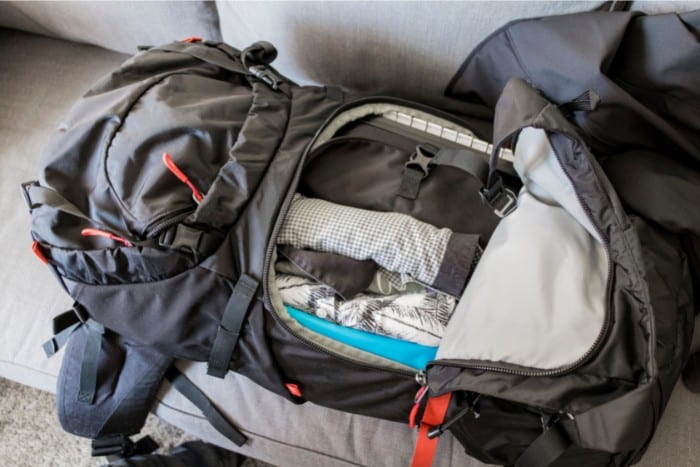
5. Keep Bulky Items to the Bottom
You’ll have at least a few items with some bulk. These can be difficult to squeeze in at the end of your packing when you have minimal room left.
Instead, you need to gather up all of your camping gear before you start to pack. This allows you to sort through it and place bulkier items on the bottom of the backpack.
This can include water bottles (if you don’t have a side pocket), pots and pans, or even blankets you won’t need until nighttime.
On the other hand, you can keep items that need to be accessible during your trip on the top of the backpack.
For example, keep your snacks and sunscreen handy and other small items that might come in handy while traveling to the campsite.
The best part of packing your bulky items on the bottom is that many are soft and can protect your lower back by absorbing some of the shock.
6. Use Dehydrated Food
Have you ever come home from the grocery store, totally loaded down with the weight of six or seven bags of groceries?
Avoid carrying all the cooking essentials on your camping trip, and plan to rough it a little.
Dehydrated food and MREs are great options to keep your backpack as light as possible while still carrying everything you need.
Most of these dehydrated foods will need boiling water to reactivate them. With that in mind, you may want to bring a small camping stove and enough fuel to heat the water for the whole trip.
The Jetboil is one option that doesn’t take up much space in your backpack and can boil a cup of water in just minutes.
While the stove may take up precious room in your backpack, it’s ultimately worth it to not have to pack cans of non-perishable food or refrigerated meats.
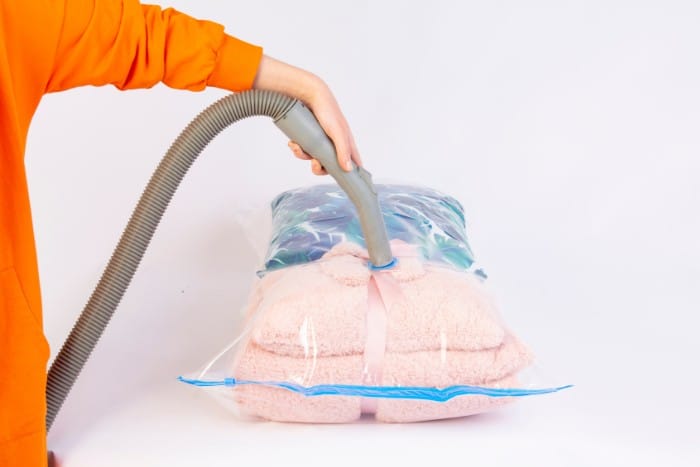
7. Make Use of Compression Bags
Chances are that you’ve already realized you have many items to squeeze into the precious space in your backpack. It might seem too much to fit – and it might likely be!
Make the best use of your space by utilizing compression bags designed for travel. You can put your army-rolled clothes in them or stuff them with your sleeping bag if you have one big enough for this.
Once they’re loaded with all the gear you need to take with you, you must suck the air out with a vacuum. A travel compression bag may allow you to cut the bulk of these items by as much as two-thirds.
It takes out all the air that takes up space between items and layers. Many people neglect to invest in a decent set of these bags, but they can seriously reduce the heft of your camping backpack.
Try them out to see how much extra space you can score in your bag, and you’ll never do it any other way again.
Remember that you could pack your sleeping bag and pad in compression cubes, but you’ll need to fluff the bag back up when you unpack.
If the fill of the sleeping bag is too compressed, it won’t be able to keep you insulated as well through the long winter nights. Instead, it’ll allow your body heat to transfer to the cold ground.
8. Balance the Load
If you are carrying your backpack for a decent mileage on your way to the campsite, you must ensure that the pack is evenly balanced.
Start building your backpack from the bottom with the bulky items we discussed first, like your sleeping bag and tent. You can start adding other items you might not need right away, like your camping stove.
Do your best to fill in every available inch of space while being mindful of the weight of each item and its placement. A backpack that isn’t balanced will cause pain and discomfort while you hike.
When you pick it up, you don’t want to feel like you’re leaning to one side or need to overcompensate on either side for a heavier pack.
9. Keep Heavy Items in the Middle
We’ve already covered how you want to keep your sleeping bag and bulkier items at the bottom of the bag, but it’s also important to consider where your heaviest items are.
These must-haves are bulky, but they aren’t particularly heavy. Your heaviest items should be kept around the mid-back level to make it as easy as possible on your spine.
This also helps you to maintain your balance while hiking a tricky trail. If your backpack is too top-heavy, you might fall back when you inevitably trip over a root.
The same is true of a bag with all its weight at the bottom. If you want to stay upright, keep the weight as close to the backpack’s center as possible, with light items at the bottom and top.
That said, you also need to ensure that you keep the lightest items right in the front of the pack, farthest away from your trunk.
This helps with your center of gravity and keeps the strain from affecting your back as greatly.
This is where you’ll want to store items like towels, blankets, or extra layers that didn’t fit in your compression cubes.
10. Wrap Bulky Gear
Prevent yourself from getting poked in the back with bulky gear like your camping stove or fuel canisters. This tip also allows you to keep your items upright a bit easier.
Take some softer items, such as sweaters, that aren’t in your compression cubes. Wrap up the bulk items in these articles.
You can even tuck some in the folds of your sleeping bag if you’re careful when pulling it out when you reach the campsite.
Not only does this offer some protection for your gear, but it also allows you to have a bit more comfort while carrying it.
11. Utilize Accessory Pockets
If you have accessory pockets or lash points, use them well!
This is where you’ll pack anything you might need while in transit: sunscreen, compass, first aid kits for blisters from your boots, and your water bottle for the hike.
Think about what small items you don’t want to have to dig through your pack to find. These should make it into these easily accessible pockets.
Investing in some small pouches that can be attached to lash points with a carabiner clip can also be helpful.
For those backpacks that are useful enough to carry a tool loop, you can use this to carry gear that you don’t want puncturing anything in your pack.
For example, you might want to use this to carry trekking poles or an ice pick. With all that being said, you should still be careful carrying things on the outside of the backpack.
It can easily catch on branches and other items while you’re hiking. Only put items here that you truly need or can’t fit anywhere else in the backpack.

Final Thoughts
Packing your backpack for a winter camping trip is much more involved than a summer one.
You’ll need extra supplies to make it through a chilly evening, like extra layers, food, water, and even more fuel for your camping stove.
With these tips in mind, you’ll be able to pack comfortably so that you can carry your backpack for longer hikes to the campsite you had in mind for your next trip!